Canyon in a Box
 Have you ever seen a deep ravine, a bottomless gorge, or even the Grand Canyon? These features form after years of erosion, which is the natural, destructive action of water and wind on stone.
Some canyons form quickly, while others have been slowly formed over hundreds of thousands of years. But life is short, so why not make a quick model of a canyon in a box?
The Experiment
To make a canyon in a box, first you need a box (duh!), then you need to fill it with layers representing the different rock layers that would be laid down over thousands or even millions of years, and finally you need to carve a canyon with the forces of erosion. Ready to shape the world? Let’s begin.
What to Use
- a utility knife or scissors (for cutting a hole in the box)
- a marker
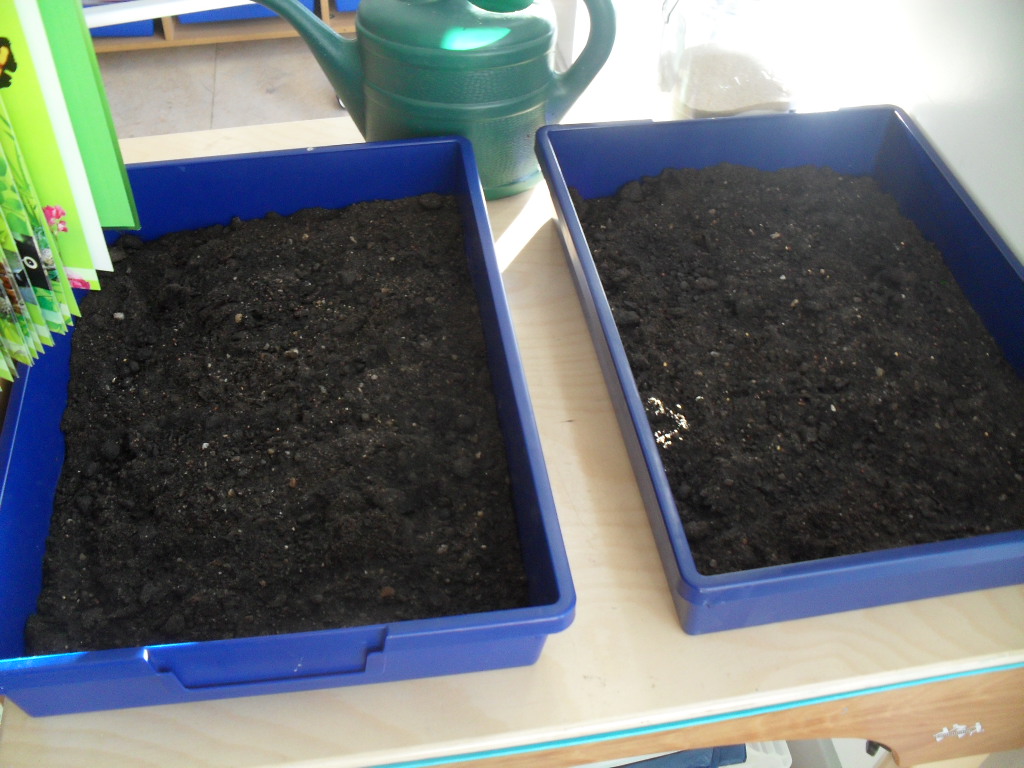
- a clear-sided box (a cheap plastic box is best, one that you can but into)
- dirt, sand, gravel
- a pitcher of water
- a brick or a couple of rocks
What do you think will happen?
Read the experiment then make some predictions about what will happen. Some of your layers may be more resistant to erosion than others – can you guess which ones, if any? What shape will your canyon take? Try drawing a picture of what you think it will look like.
What to Do
STEP 1 – Prepare Your Box
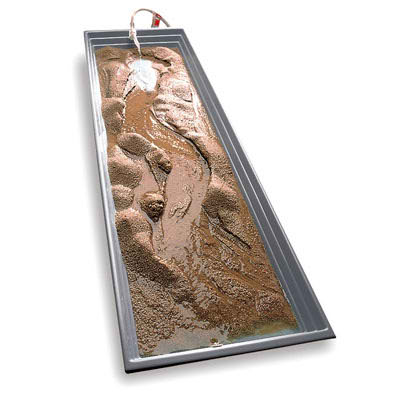
a) The box will give a simulation of a section of earth that has water flowing over it. Just like water in naturally flows to the sea your box will also need an outlet. Your box will most likely be rectangular, so choose one narrow end and mark a vertical line in the middle of one end from the top to very near the bottom. Then draw a line on the left and the right of your first line, each about 1cm from it.
b) Cut down one line to near the bottom of the box, curve over to the other line, and cut back up the second line to the top of the box, so that you cut a deep U-shaped notch out of the box.
c) Find a place to put the box where water and some dirt can run out from the notch. Somewhere outside would probably be a good idea!
 STEP 2 – Laying Down Layers
d) Start making layers of dirt, gravel, sand, clay, or whatever materials you have collected. Make the layers of different thicknesses and alternate different types of material however you like. After you lay down each layer, press it down firmly with your hand before adding the next one. The layers you build are like the rock layers deep in the earth.
e) Using your finger, a stick, or any other pointy tool, draw a curvy line in the top-most layer from one narrow end of the box to the other end, making sure that your line ends at the notch you cut out of the box. This is like a small streambed that will be the start of your canyon – but will the canyon strictly follow the line you drew?
STEP 3 – Erode It!
f) Fill up a big pitcher full of water, then take your box to the testing area that you’ve already chosen (outside, where things can get dirty!). Lift up the narrow end of the box that doesn’t have the notch cut in it and place the brick or couple of rocks (or anything else that can get wet) under that end to prop it up. Water runs downhill, so you’ve just made a slope!
g) Pour the water in a steady stream onto the uphill end of the box at the point where your line starts. Pour just a little at first, then increase the flow a little more if you think your dirt can handle it. The water should follow your curvy line, at least at first.
Keep pouring as long as you like. It might take a while for some of your layers to wash away, but real canyons can take millions of years, so, you know, don’t complain ;)
What Did You Find?
Did the erosion pattern match your prediction? Which layers washed out quickly? Which layers resisted the water and didn’t erode very much? When you look through the sides of your clear box, you can still see the original layers left over, just like the layers are left under the earth on both sides of a natural canyon.
If you want to try another experiment, be sure to check out how can you make your own dry ice rockets!