Sprouting Seeds
 Seeds are the parts used by many plants to reproduce themselves. A seed carries all the information a plant needs to grow into an adult. However, seeds from different plants are different and have different needs, just like different animals do.
Some seeds need more heat than others to start sprouting. Some need more water. Some will grow better in different soils. But seeds don’t send text messages or do interview, so how can we find out what seeds like?
The Experiment
To find out the conditions different seeds like to sprout, you’ll need to do some comparison tests. This means that you can take seeds of the same type and let them try to grow in different conditions. You have to control each condition by itself, so that you can separate the things that the seeds like from the things that they don’t.
Here’s a table with some different conditions you can test, which are also called “variables”: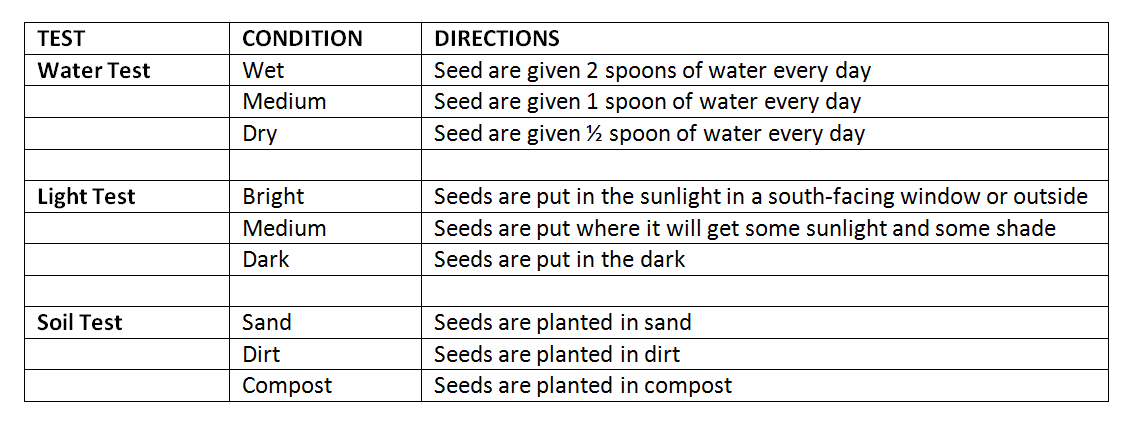 What to Use
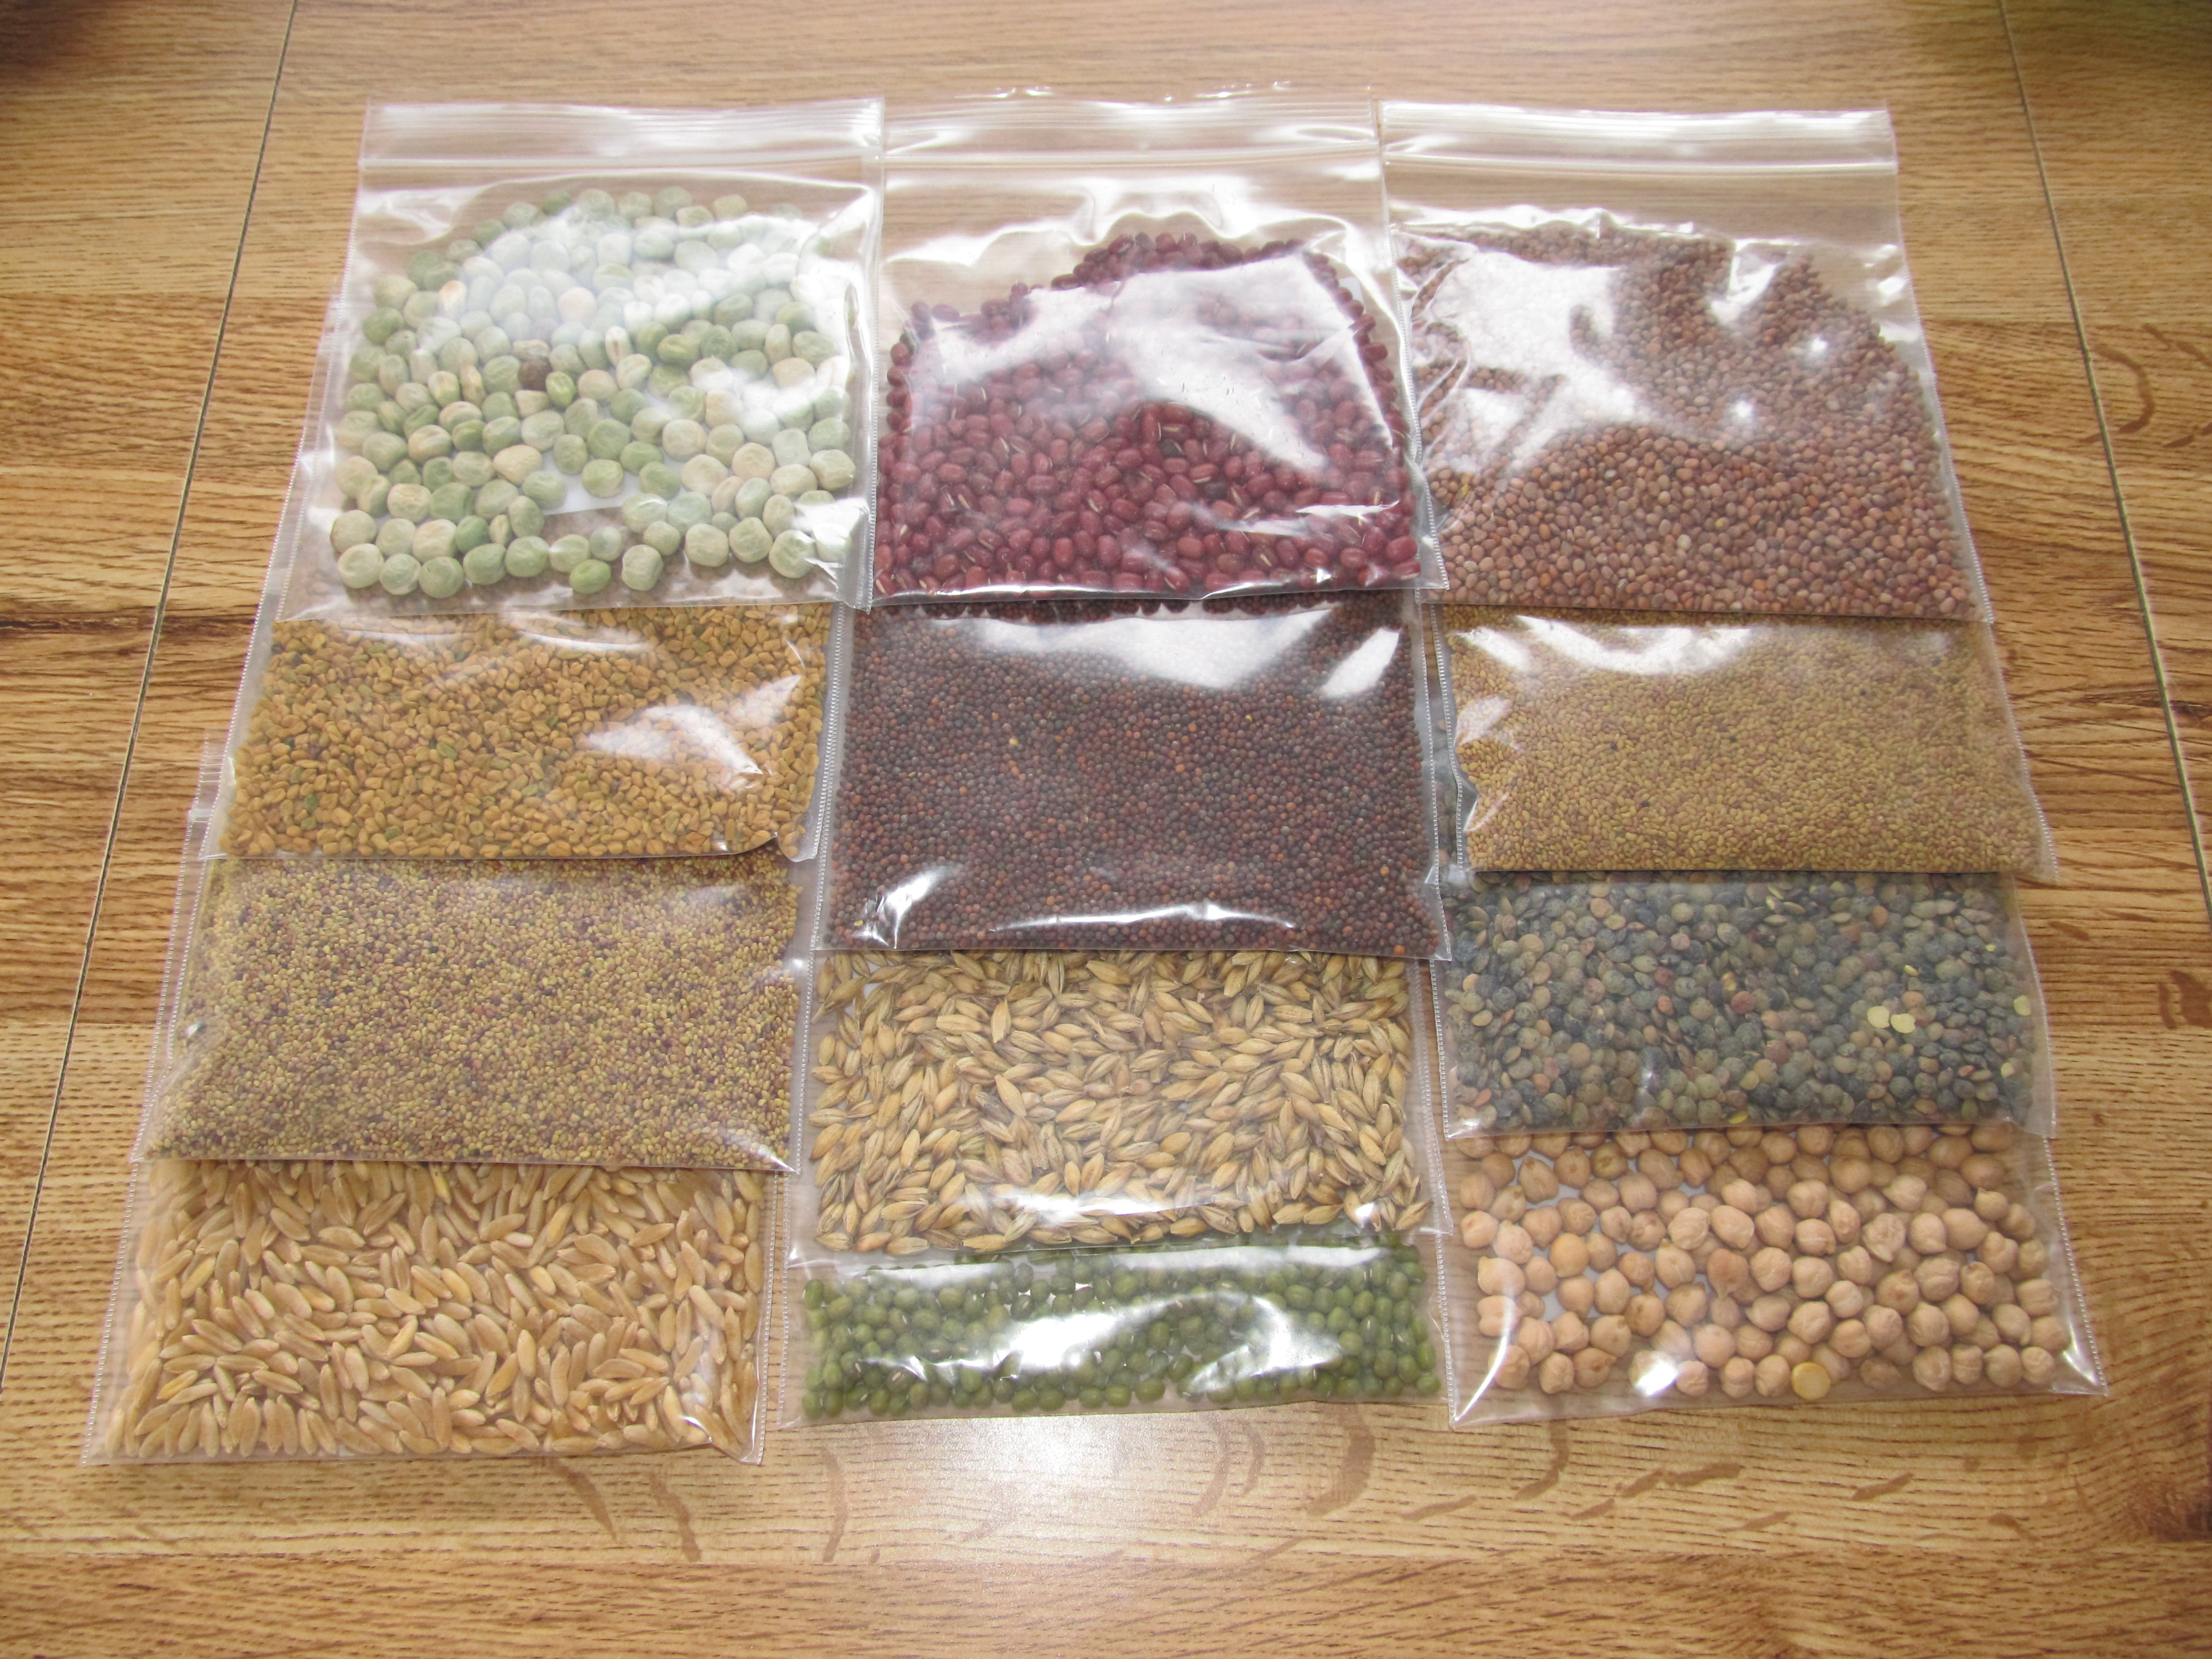
- package of seeds
- cups, all the same size (for the example table, 9 cups would be needed)
- masking tape and pen, for labelling the cups
- dirt/soil
- sand
- compost
- water
- spoon
What do you think will happen?
Before you do the experiment, read through the What to Do section and make predictions. Do you think seeds will grow better in sunny or dark places? Do you think your seeds will prefer lots of water or just a little? Write down what you think will happen.
What to Do
STEP 1 – Preparing your Cups
a) You will need a different cup for each part of the variables you test. For example, if you want to test moisture, you can use 3 cups: 1 for wet, 1 for medium, and 1 for dry. In the example table, you can see that you would need 9 cups. If you want to test other conditions, for example, whether seeds like chocolate, make sure you have cups for this part, too. It’s a good idea to try at least 3 cups for one condition, so you could add a lot of chocolate, a little chocolate, and no chocolate to your cups. Label each cup with the name of the water test, AND the condition it represents. For example, for the cup that will get 2 spoons of water every day write “Water Test: Wet”.
b) Add an equal amount of soil to all of the cups, except for the Soil Test cups (for these, add sand to one cup, dirt to another, and compost in the third cup, all in equal amounts).

c) Put an equal number of seeds into each cup. If your package has a lot of them, try to put a lot (5-10) into each cup. Read the directions on the package for the type of seeds you have and plant the seeds according to these. They will usually tell you how far down into the soil to plant the seeds.
d) Put 1 spoonful of water into each cup, except for the Water Test cups (in these, give one cup 2 spoonfuls of water, the next cup one spoonful, and the last cup ½ a spoon of water). Choose a time and do this every day at the same time.
e) Put all of the cups into a place where they will get some sun and some shade during the day, except for the Light Test cups (put one of these with the rest of the cups, one in the full sun, and one in the full shade / darkness).
OPTIONAL STEP
*If you want to add a test to this experiment, like the “Chocolate Test”, then do so now. Choose 3 conditions for your test to compare, and keep everything else (water, light, soil) the same.
*If you want to test others, then get a whole other set of cups and set up all the same conditions, but using different seeds. Make sure to label the types in each cup!
STEP 2 – Making Observations
f) Make a chart in a notebook, or better yet, on a big piece of paper taped to the wall! Show all the tests and conditions on it but then make spaces for days behind. Some of them are slow, so you might want to leave enough spaces for 2 weeks. Here’s an example: g) Each day, water your seeds and take a look at them. Write in each cup’s daily space what you see, and when sprouts are big enough to measure, measure them with a ruler and record their heights, like this:
 What Did You Find?
What did your experiment, with all of its tests, show you about the type of seeds you chose? Did they grow fastest and tallest with more water or less water? In the light or the dark? In dirt, sand, or compost? With chocolate or without (just kidding)? Your chart of your observations can show you what the seeds prefer and tell you if your predictions were right or wrong. Remember that what you find for one type of seed won’t always mean that all seeds like the same conditions.
Check out the experiment related to bacterias!
Happy testing!